Monday 28 April 2014

DIY food: Jalapeno poppers

OK. I am NOT a spicy person. Well, not in terms of food tastes at least ;) I often shy away from hot foods, but recently I have been working on my tolerance! I try really hard to eat more and more spicy things so I can start enjoying them instead of wanting to rip my face off and dunk it in a vat of milk. 
So, one random evening when Nick wanted to buy Jalepeno poppers I suggested we make them ourselves instead. I had frozen a bunch of Jalapenos from the summer time at the farm, so we picked up some cream cheese and instead of breading them, decided to wrap them in bacon- because it is so much healthier of course. 
So- not much to them, pretty much cut the peppers in half, take out the seeds, stuff with cream cheese and wrap in a half slice of bacon! then bake and 350 until they look yummy.
Of course they are MUCH more delicious than store bought- and no weird added preservatives and crap! BUT they are also MUCH hotter. By the end we were just eating the cream cheese and bacon. No shame. 


HOT HOT HOT

Lesson from this one? Experimenting is fun, but also taking something that you know already and finding a healthier way to make it is also fun, and can sometimes be even more rewarding. Let's all admit it. Even though we all know homemade should taste better, sometimes food from a box is just so delicious and satisfying because, well it has to be or people wouldn't buy it. So, being able to personally re-create something you always just automatically associate with "processed" makes you feel so accomplished- you just won at life by making something that is good store bought taste even better by making it yourself.
Wednesday 16 April 2014

DIY project: Reusable snack baggies

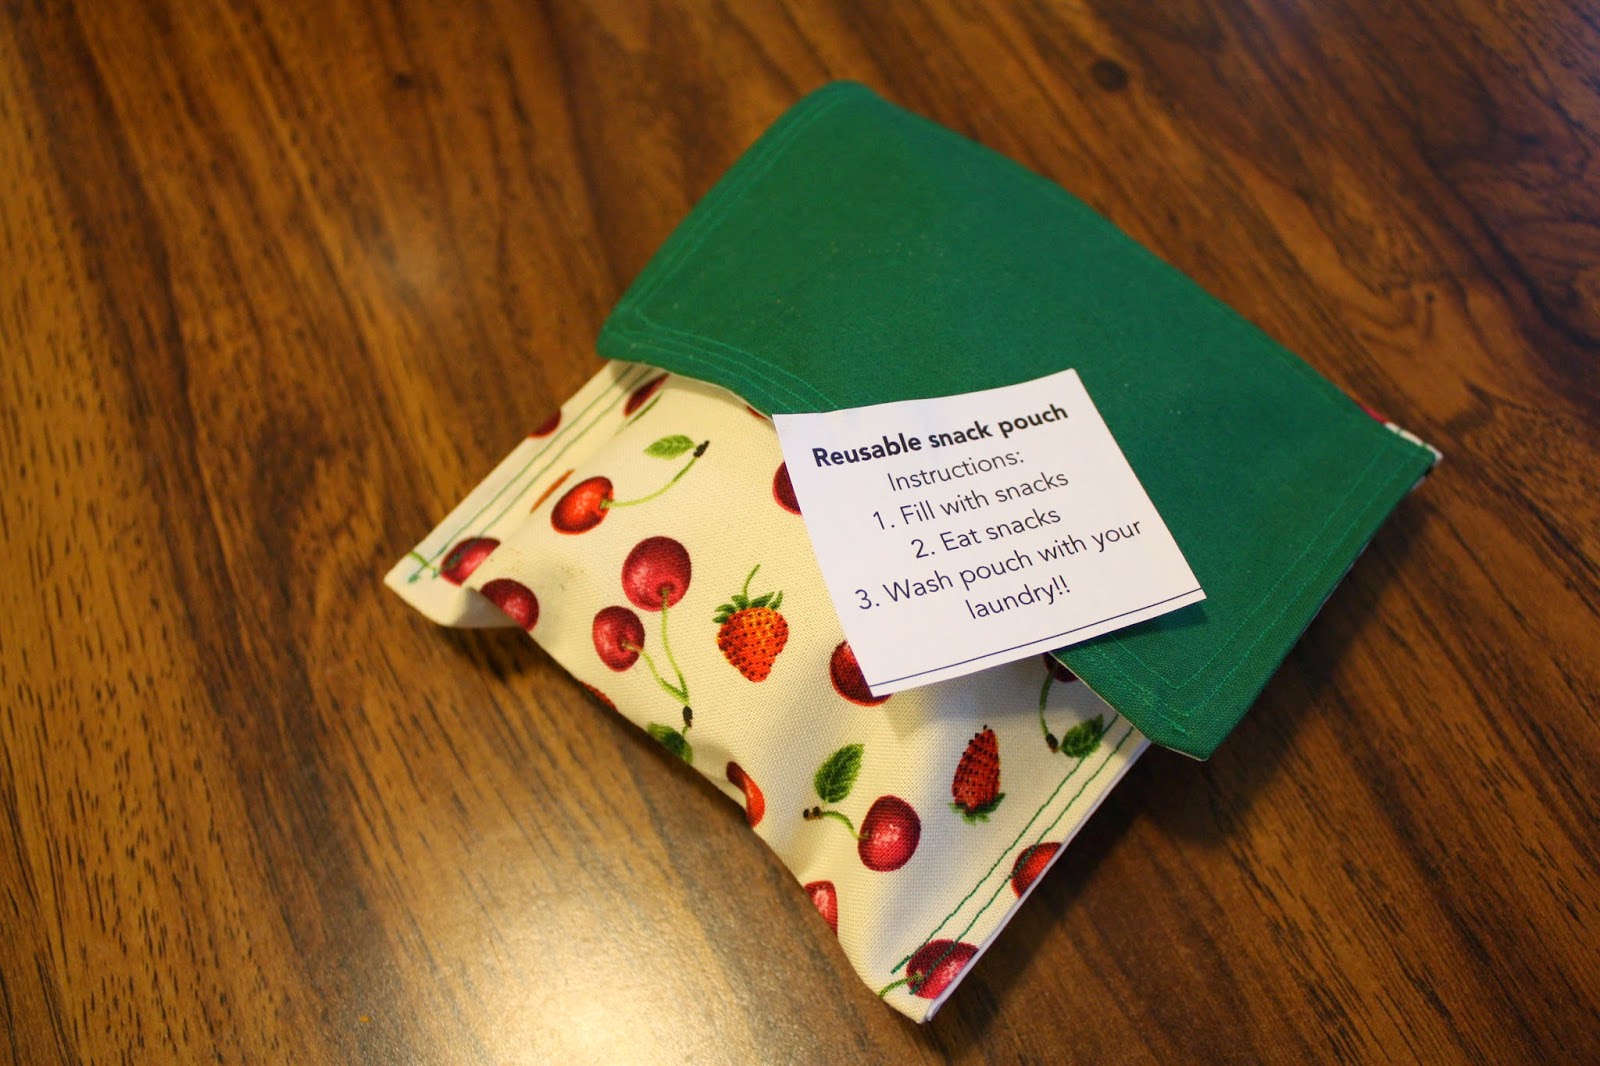
Snack time is anytime-and now it can be "green" too! I started making reusable snack baggies as gifts for my friends and family at Christmas. I immediately fell in love with the idea as someone who often carries snacks around with me, and because it seemed like a nice, simple introduction to sewing. 
I've sewn before but mostly just with my Grandmother, so sewing these little guys made me feel very accomplished :)

Sewing has always been something that I have wanted to be good at. Both of my Grandmothers sew- one made my prom dress, and the other has helped me make a jumper, a skirt/top combo and more. Being able to make my own clothes, and turn old clothes into new things is a transformation that continually amazes me. Not only does it open up opportunities for me to push my creative limits, but it is also a useful skill which I intend on using for the rest of my life. Yes, my future children are the ones dressed in weird handmade clothes...

The baggies are a really simple pattern, and don't take much time at all (you can find the pattern here: http://offbeathome.com/2012/03/craft-replace-plastic-bags). Also they are perfect gifts since they're homemade and practical. 

Also, what is better than a waste free lunch? That's right- NOTHING. This is just one more small thing that we can do to reduce our impact. A sustainable life is full of trial and error and doesn't come overnight. I sincerely believe that small things do make a difference. So experiment with sustainability. It could lead you to really cool places. Just like where these little baggies led me!

With the skills I learnt from my Grandmas, and with some help from Pinterest, I have entered the world of bartering! Since I started making the product, I have traded them with two people for different sets of earrings! It works perfectly- I enjoy making the baggies, and by trading them, I get some high quality and highly creative homemade goods in return! 


SO if anyone is interested- I am super willing to barter some more snack pouches for anything you have to offer! Also, if you like the earrings I got in return, just let me know and I can point you in the right direction.


Monday 24 March 2014

DIY food: Granola greatness

make sure it is all spread out to get an even bake!
Who doesn't like yogurt and granola in the morning?? I sure do- and Nicholas LOVES it. He isn't much of a morning person but when it comes to breakfast, he likes to do the "healthy" thing and have granola.
So, since I find granola to be extremely expensive, I decided to make my own. It couldn't be that hard right?? RIGHT! It was easy peasy!!
I just looked at a few different recipes online and came up with my own version of them to make the granola- the most important part for me was to use maple syrup to sweeten because, well does that really need an explanation? It's maple syrup. Liquid gold.
yummy customizable granola for breakfast- can't be beat
The main reason why it was important for me to make my own granola is because then I know that there's nothing weird in it of course, and also it is fun to customize and experiment with different seeds, nuts and fruits!
Also, I don't love the boxed stuff- I find it just tastes bland- which means I end up not eating a proper breakfast, or eating something too heavy. The granola gives me the freedom to experiment and fills me up the perfect amount to keep me going all morning.
Making this granola encouraged me to get creative, contributed to my health by encouraging proper breakfast consumption, and also adhered to my attempt at a more sustainable life by reducing our waste production.
So, if you like granola DEFINITELY try making your own. Now I just have to make my own yogurt!

The main inspiration for my attempt was from the great Alton Brown- see his recipe here
http://www.foodnetwork.com/recipes/alton-brown/granola-recipe.html


Monday 10 March 2014

DIY project: Map frames

This project is one that I had really been looking forward to completing since Nick and I came back from all of our crazy travels this year. I was inspired by Pintrest posts that had pictures of people on their wedding day with a newspaper from that same day surrounding the picture. However, I modified it for travelling by putting maps from wherever we were when the picture in the frame was taken as the mat. 
It was also really important for me to get each place that was significant for us during our trip on the frame. This took a bit of collaging but I didn't want to forget about any of the places we have been!

I am so so so excited to continue adding to the pictures as we travel more- and I also find it is a really nice way to summarize a trip! When you get back from a big trip or even a small vacation, it is sometimes hard to get back into the groove of normal life, and sometimes I find it is also easy to forget all about where you just were! It is really important to me to bring the experiences that I have had into my everyday life; the lessons I learned, the friends I made etc., and this small craft project allows me to reminisce about it all while I'm completing it, and serves as a daily reminder to appreciate those experiences and draw from them daily. This was just a fun way for me to showcase the travels that we have done as a couple- and although we sort of have a mini shrine for our relationship, I really love having all those memories displayed in such a neat way! 

If you want a how-to for the project then keep reading!
Picture frame map craft!

How to:

It wasn't a very difficult project (although printing the pictures was kind of a hassle- I'll explain later), but it did get a little bit expensive with the picture frames so be aware of that!

What you need:
-ModgePodge
-Paint brush

-exacto knife
-ruler
-mats of your desired size
-picture frames
-maps- try to collect these while travelling but if not there is a really cool Map store in Halifax where you can send your best friend Dana who lives there to pick up the weird maps for you (like Australia and Botswana/Zimbabwe)- other more local maps you should be able to get at Chapters. 
-your favourite photos!

First things first you need to pick your frames and photos. For the frames I suggest going to Michael's- they always have sweet sales on and always have awesome coupons that if you pay enough attention, you can combine the two! As for pictures, pick your favourites, and get them printed anywhere- I do not suggest doing it online because sometimes they print funny- just go into the store and do all the aligning yourself, its less confusing. 

Once you've picked which pictures you want in which frames, cut up the maps so that the places that you want to showcase will be on the front of the mat. For some of the frames I cut out a whole bunch of places, and for others, there was only one place that mattered to me so I just stuck the mat on the map in the right spot and traced around it. Make sure you leave a bit of space so you can fold the map around the back of the mat for nice clean lines (also when you do this be sure to cut the corners so they fold nicely!).

Now you're ready to modge podge! I painted it onto the front of the mat, stuck the map on there, then flipped it over and put more modge podge on the back to stick the folded over bits down. Then I gave the whole mat (front and back!) another layer of the stuff to keep it from peeling, and give it a nice finish. 

Now just let 'em dry and put them in your frames! YOU'RE DONE! wahoo!

TIP- make sure you stick the maps on the mats the right way up considering your pictures, if they are landscape or portrait, otherwise your map will be sideways when your pictures are right side up (I may or may not have done that with the Botswana pictures...)

Now you can enjoy your travel shrine and continue to build it as you see the world!

Thursday 6 March 2014

Breathing creativity

What does being creative mean?
For a long time, I thought it meant that you could draw, or play an instrument, or you always had really funny ideas.
It was only in the past couple years that I realized this is not the case. In our society, the standard for creativity that is constantly being perpetuated, is what I had grown up believing- you were only creative if you were good at the arts. This was drilled into me in elementary school, in high school, and even into University.
I always wished I could be good at painting or could write music because I so desperately wanted to be creative, and those activities were pre-requisites. I had some amazingly creative people in my life, and these were all things they had in common so naturally that is what made them creative right?

It was in my Entrepreneurship class that I was first exposed to the idea that creativity is more than art. We had a group project where we had to come up with an idea/product. We had to follow specific steps to do so, which included a team brainstorm. Previous to the brainstorm, the Professor told us that there are no bad ideas. Every single idea should be thrown out there, even if they are "terrible" because they always lead you in the right direction. At that group session, I was so nervous to embarrass myself in front of these people I didn't know, but I decided to take that advice to heart. I threw out ideas from Bubble tree homes, to who knows what else! That is when I learnt that creativity is having the confidence to embrace it.

Since then, creativity is something I have thought a lot about. I have discovered that creativity is embedded in every one of us, it is just up to us to open the flood gates and let it come rushing out. In the beginning, it might be something you have to work on, at least for me I know it is. But all it takes is being conscious of your situation, and making an effort to bring creativity into your life. From a young age, we are taught to hide our creativity- put down the building blocks and pick up a pencil. We are taught to follow rules and think inside the box. Creativity requires letting that all go. Let go of what those around you are thinking, let go of your preconceived ideas of what being creative means, and just be. Be confident in your ability to create. Be ready for a challenge. And most important of all, be encouraging to others in their creativity. If we encourage one another to explore and create, wonderful, beautiful, unimaginable things can happen.

Create something every day. Create hands-on, create memories, create love.

Let creativity come naturally just like it used to